|
The frame design process began with focusing on our main design
parameters. We wanted a light and easily maneuverable vehicle with a very
small frontal area. We decided on a recumbent style bicycle due to the success
of these in many of the IHPVA's
races. One of our main influences was Warren Beauchamp's Barracuda. |
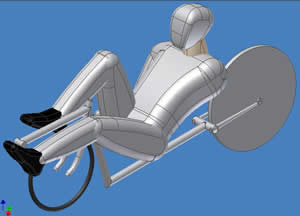
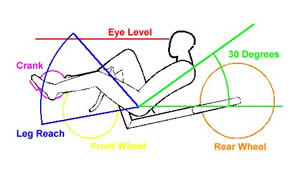
We began working in Autodesk Inventor with a human
solid model. Since the rider was the one thing that we couldn't change
we designed the frame around the physical limits of the rider. To keep the
frontal area as small as possible we opted for a medium wheel base and the
rider's legs straddling a 20" front wheel.
|
|
|
|
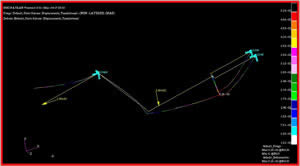
We wanted to keep the frame as light as possible so we designed
the frame with no triangulation to minimize the amount of tubing. We used
the finite element package PATRAN/NASTRAN
to optimize the tubing diameter needed to keep the stress in the frame at
an acceptable level. The final choice was a 56mm diameter, 1.1mm wall thickness,
4130 Cromoly steel tube which we obtained from Burley
Design Cooperative. |
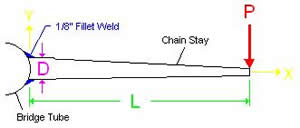
| We used weld design methods to analyze the critical weld that
joined the chain stays to the main frame. It turned out that the stress
in the welds would be unacceptable, so we redesigned the joint to remove
the majority of the stress from the welds. |
|
|
|
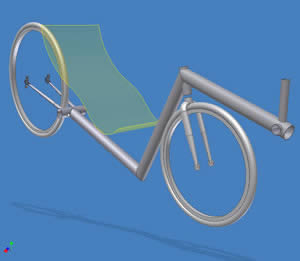
Once we were satisfied with the frame analysis the model was
made as accurate as possible. The fork, bottom bracket shell, dropouts,
and chain stays were donated or reduced in price by Gordon Freedman at Cycle
Classics in Portsmouth. Gordon builds custom bicycles and gave us a
lot of valuable advice on the frame construction. The donated parts were
added to the 3D model. The only items that were not entirely accurate were
the wheels. We had to finalize the model before the new wheels came in,
so we used the dimensions of some similar spare wheels we had. This ended
up causing us problems when the new wheels showed up. |
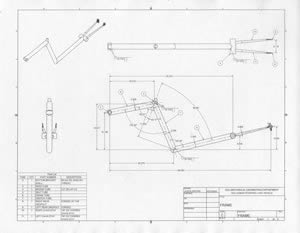
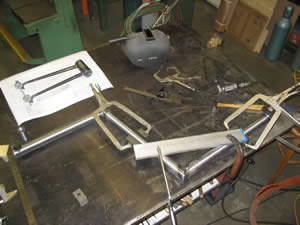
| After everyone was satisfied with the model we made a set
of working drawings to use at the shop. We plotted the drawings on 'C' size
drafting paper for easy visibility when we were working. |
 |
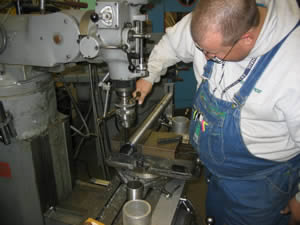 |
Eric, the team machinist, began by coping the ends of the
tubing to accept the rear assembly and the bottom bracket shell. He used
a boring bar setup due to the large diameter cutouts. We wanted a fairly
nice fit up since we had decided on TIG welding the frame, so we took our
time to make the cuts fairly accurate. |
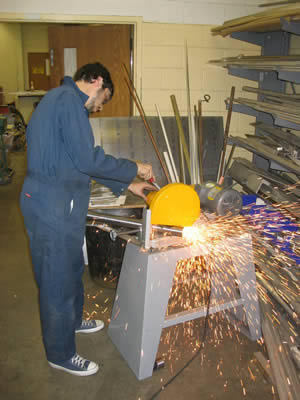
| After Eric coped the tubes, Jason set up a small fixture on
the chop saw to hold the tubes at the proper angle while mitering the ends. |
 |
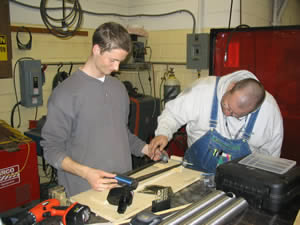 |
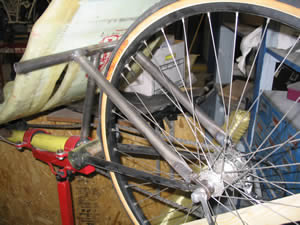
Kendrick and Eric are working on the rear assembly. We inserted
the chain stays through the rear tube to take the stress out of the welds.
The holes had to be drilled at an unusual angle so the chain stays lined
up correctly with the rear dropouts. The holes were eventually oversized
some to allow the chain stays to stay parallel. This left a some gaps that
were a little tough to TIG weld. |
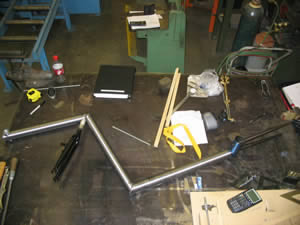
| This is the first mock up of the frame. All of the tubes have
been machined and are ready for welding. |
 |
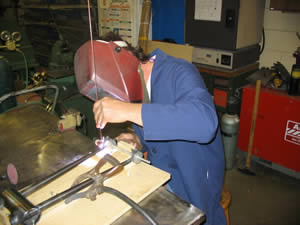 |
Kevin Colvin at the ODU Model Shop did most of the frame welding
for us. He started with the rear assembly. We built a wooden jig to hold
the assembly in place while welding. Wood may not have been the best material,
but it ended up working without burning too much. |
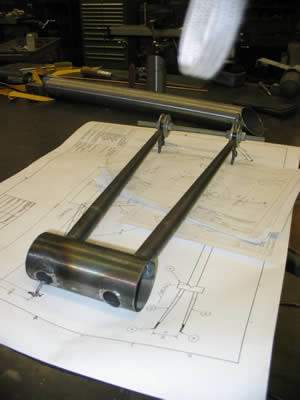
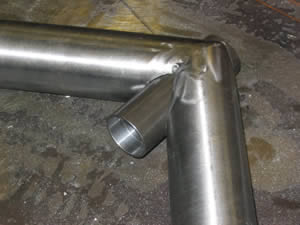
| This is a shot of the rear assembly weldment. The chain stays
were inserted through the tube and fillet welded on each side. The side
that mated to the rest of the frame had to be ground down some to make the
fit work. |
 |
 |
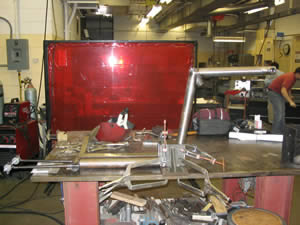
We used standard vise grip clamps and some scrap material
to make a fixture for the frame. The welding table was a flat 3/4"
steel plate and we used that as the reference plane. Some stops were welded
to the table to hold the tubes at the correct angles during welding. |
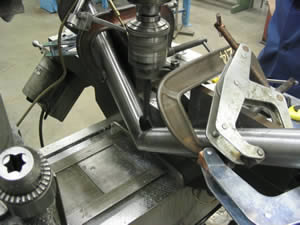
| After we welded the front assembly, we needed to make a bore
for the head tube. We mounted the frame to the back of the mill table with
about eight different clamps to keep it secure while we bored the hole.
An extra long boring rod was needed to get all the way through the tube
and we had to keep an eye on all of the clamps because they vibrated loose
easily. |
 |
 |
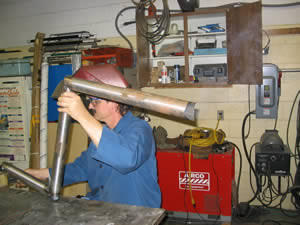
This shows the head tube inserted into the new bore. It was
little tough to cut the bore but it ended up working and made a nice precise
fit. The head tube was custom made for the Ritchey
head set that we purchased at a reduced price from Mike Shipp at East
Coast Bicycles. We couldn't find a head tube of suitable length and
material from a frame dealer, so we made our own. We didn't bore out the
entire tube to a thin wall thickness and it ended up being a little heavier
than necessary. |
| The frame was smoking like a dragon while the head tube was
welded in. |
 |
 |
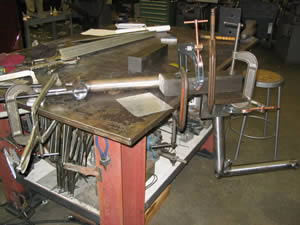
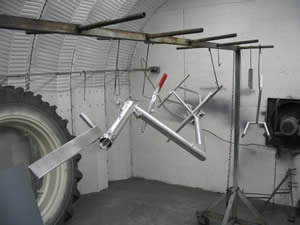
This the fixture we used to weld the rear weldment to the
front weldment. Angle blocks were used to the keep the frame perpendicular
to the table and shims were used to keep the chain stays in line with the
frame tube. |
| A similar fixture was used to weld the underside of the frame. |
 |
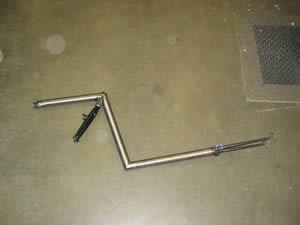 |
This is the final frame weldment with the Dahon
aluminum fork inserted into the head tube. It looks just like the model,
except for a couple of errors. We realized that we welded the bottom bracket
shell in backwards and that some of the tubes were cut approximately 1/2"
too long. These errors didn't cause any headaches, because the bottom bracket
can be used backwards, and the tube length didn't change the frame dimensions
too much. |
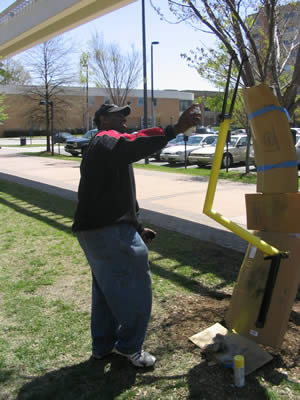
| Derrell is putting our first coat of paint on the frame. Kendrick
and Jason both wanted a yellow frame, but they ended up compromising and
made it partially black. This finish was just to keep it from rusting while
we worked on it. The real paint job would come before the competition after
we had finished working on the bike. |
 |
 |
After the second seat was designed a rear triangle was added
to the frame. This provided a mounting area for the rear brake and the seat.
It also helped improve the strength in the rear section of the frame. |
| The frame is hanging up at Flatlander's Hot Rods, where Aaron
Bloch sandblasted the frame after all the welding had been completed. We
painted it with some cheap silver spray paint that didn't quite give the
expected finish, but that's what happens when you paint it two days before
the competition. |
 |