 |
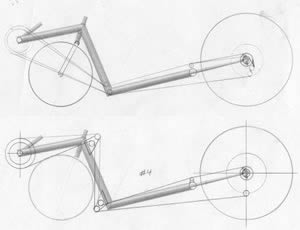
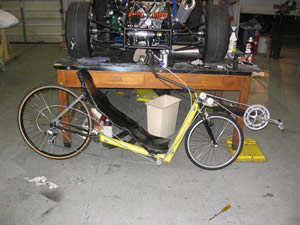
The frame and seat were completed before much thought was
put into the drivetrain design. This gave us a few headaches when we finally
started to add the drivetrain. We had originally planned to have the chain
line pass over the front wheel. This would have been optimum because the
chain would only have a slight bend in it. After the drivetrain was mocked
up we determined that the chain passing over the wheel wasn't going to be
acceptable. |
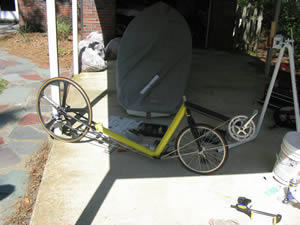
| This is one of the first drivetrain mockups. The obvious problem
is the limitation on the turning angle of the front wheel. We thought that
this would be acceptable, but we didn't factor in the fork width. The chain
rubbed the fork in the neutral position. We didn't want to try to design
a mono-blade fork so we opted to snake the chain along the frame tube. |
 |
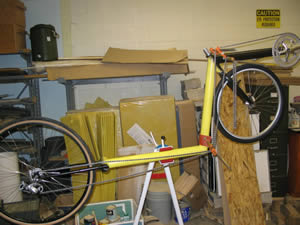 |
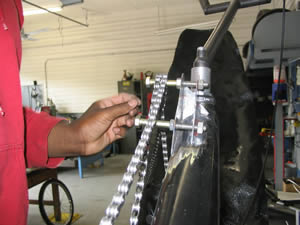
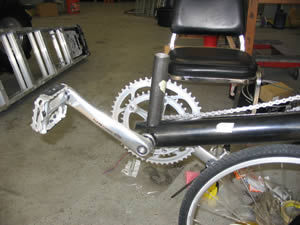
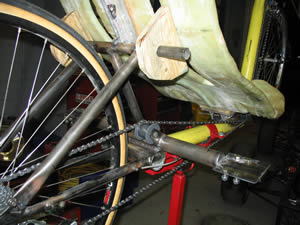
Wood clamps were used to hold the chain in place while we
determined the best positions of the idlers. The crank, bottom bracket,
and rear cassette were from the Shimano
105 group. The rear derailleur is a Shimano
Alivio mountain bike derailleur. We choose a gearing setup with nine speeds
on the rear and dual chain ring on the front. |
| The first attempt at idlers were the pulleys from a rear derailleur.
The mounts were made from 1/16" cromoly steel plate and TIG welded
to the frame. |
 |
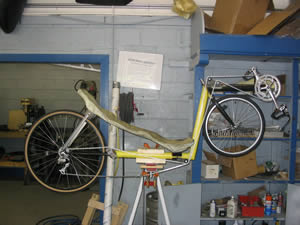 |
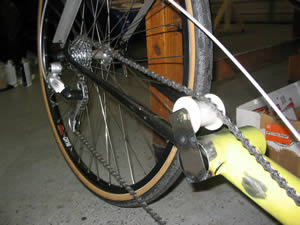
The chain line follows the frame tube and completely avoids
contact with the front wheel, allowing unhindered turning (except for the
crank interference which was intentional). The idler mount under the seat
is built into the sliding seat bracket which was supposed help keep the
chain out of the riders crotch no matter where the seat was positioned.
A final idler was needed to clear the chain from the chain stay tube. |
| It didn't take long to figure out that due to the sharp bends
in the chain line we produced very large forces at the idler mounts. The
lower mount bent immediately along with the bolts on the upper mount. The
derailleur pulleys were also unsuitable due to the very short teeth. The
chain wouldn't stay on them for long. |
 |
 |
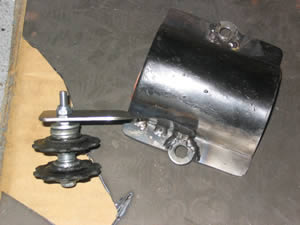
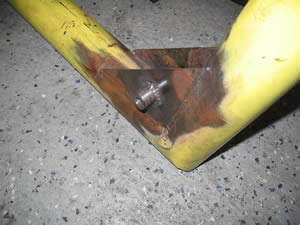
To fix the idler mounts we decided to beef them up. The lower
seat bracket mount is shown with additional strengthening plates. |
| An additional plate was added to the upper idler mount so
the bolts were supported at two places instead of one. The smaller idler
bolts that fit the derailleur pulleys were replaced with 5/16" Grade
8 bolts, to prevent them from bending. |
 |
 |
We needed a quick solution to prevent the chain from popping
off of the idlers so we made some idlers out of nylon with raised edges.
We mounted the them directly to the bolts without any sort of bearing. |
| The lower idlers were setup side by side, each spinning in
the opposite direction. In sharp turns the outside idler dragged the ground. |
 |
 |
The rear idler was mounted on a single plate since the chain
only had a slight bend and didn't put much force on the idler. |
| The chain line is shown with the updated idlers and brackets.
These didn't last very long due the the lack of bearings and friction against
the nylon idlers. The lower idlers also wore from touching the ground in
sharp turns. |
 |
 |
The front derailleur need a tube for mounting. We had to approximate
the angle of the tube versus the top chain. Comparisons were made to a standard
road bike to get the correct derailleur tube angle. |
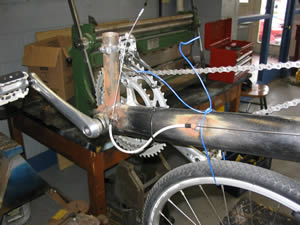
| The front derailleur is shown mounted with the cable configuration.
We couldn't loop the cable under the bottom bracket shell as in normal bike
setups so a cable stop was welded on the side of the frame tube and the
cable housing had to be zip tied to the frame to keep it from interfering
with the crank arm. |
 |
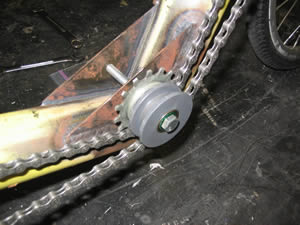 |
One final drivetrain redesign was needed before the vehicle
was ready for competition We exchanged the nylon idlers on the tension side
of the chain with some freewheel sprockets from Cycle
Classics. We added skateboard bearings to reduce the friction in both
the freewheels and the Delrin idlers. The lower idler was also moved from
the seat bracket to the frame. This provided the needed ground clearance
when making sharp turns, strengthened the lower frame joint, and provided
an attachment point for the new seat bracket. |
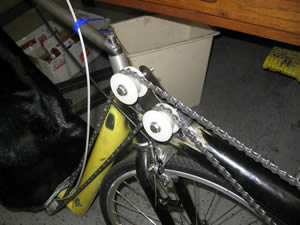
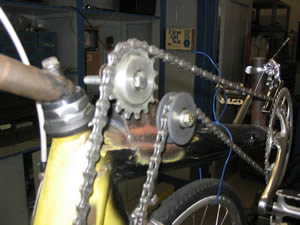
| The upper idlers are shown with the new bearings and the larger
diameter long toothed idler. We still had the occasional chain hop off.
Better alignment was needed from the chain ring to the idlers. |
 |
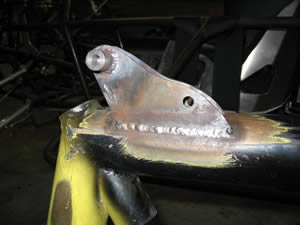 |
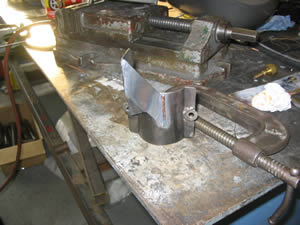
We added threaded inserts to the tension idler hole. This
provided the needed strength to keep the idler bolts from being stressed
too much and gave the needed offset to keep the idlers aligned with the
front chain ring. |
| This shows the threaded insert welded to the new lower idler
mount. |
 |
 |
Finally, the rear idler had to be moved due to the addition
of the roll bar mount. Bearings were added and the idler mount was strengthened. |