.
.
.

.
.
.
 .
.
 .
.
 .
.
.
.
 .
.
 .
.
 |
..... |
Internet
Marketing for High School Teachers
at
Old
Dominion University
![]()
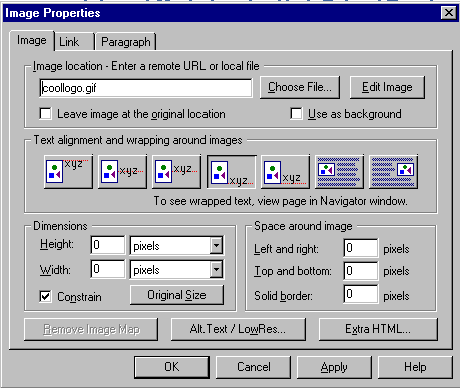
Inserting an image onto your page
- To insert an image onto your page:
One thing you should probably avoid is resizing images by dragging and moving the frame around your image. This may distort your image. Resize it by right clicking on the image and using the dimensions properties in the corresponding dialogue box. At any time that you need to return to this box, simply right-click on the image, then go to "image properties." If you have distorted your image, return to this box and click on the original size button. A few quick notes on images...
|
Netscape
Composer | Creating
a hyperlink | Insert
an image
Titles,
backgrounds, and link colors | Using
Tables | Naming
your files
Uploading
your pages to the World Wide Web | Test
your knowledge
Course
Home | Schedule
| Project I
| Resources
Phase
I | Phase
II | Phase
III
.
.
Contact Mickey Kosloski at mkoslosk@odu.edu